our editing + retouching process
software used
- Dropbox for uploading LR catalogs and RAW (or .DNG) files
- Adobe Lightroom Classic
- Adobe Photoshop
- Anthropics Portrait Pro (facial retouching)
- Luminar Neo (for punching up, adding effects like more bokeh or sunflare)
- Topaz (for sharpening)
- Smugmug.com for final delivery of images. I also have Pixieset.com galleries, but Smugmug allows uploads of .psd files if you need/want those.
CULLING + BASIC EDITS
Step 1: Prepare for Culling (skip to step 6 if you don't require this service)
Ensure my monitor is calibrated for accurate color representation.
Load your Lightroom Catalog with Smart Previews (if culling first). Note: I will need the original RAW file(s) or at least a .DNG file for all the final choices when I bring them into Photoshop for further editing.
Step 2: First Pass - Rapid Culling
Discard images that are obviously out of focus, overexposed, underexposed, or contain duplicates.
Use a Flag or Reject to mark the photos to keep or reject.
Create a collection with the first set of flagged images.
Step 3: Second Pass - Refine Selection
Review the flagged photos from the first pass.
Focus on composition, subject matter, and overall quality.
Keep images that tell the story of the event, capture key moments, or have artistic value.
Working inside the collection of flagged photos, eliminate photos that are redundant.
Step 4: Final Pass - Confirm Selection
Review the remaining photos and check for a balance of different types of shots and backgrounds.
Make sure the selection represents the story of the session.
Make final adjustments, removing any photos that seem out of place or redundant.
Step 5: Organize and Label
Create a new collection for the final selections.
Organize the photos in sub-collections by category, such as by theme, event or backdrop
Step 6: Basic Edits
Crop, transform and straighten as needed. I will only do minimal cropping - for example, if a piece of equipment or a foot is in the frame and a simple crop would remove it. When in doubt, I’ll ask!
Color correct white balance for each image and adjust HSL sliders as needed for good skin tones. My default is true-to-life color with slight saturation but I can adjust for your studio's style.
Adjust for brightness, contrast including adding/subtracting shadows and blacks. I have some clean base presets I made and a black and white preset I bought years ago that I love, but otherwise, each image will get individual adjustments. If you have your own LR presets, I’m happy to use those as well!
Step 7: Backup and Review
Create a backup of the Lightroom catalog and save to Dropbox or other cloud storage.
Review the final selection to confirm it's ready for editing, checking for any errors or issues.
I typically reserve Photoshop retouching for printed products or if the client specifically purchased fully edited images, but I don’t mind doing light retouches under the Basic Edit price point. There’s a little more info on this in the Pricing section.
If Basic Edits were your only service, I will export the .JPEGS and upload them to Pixieset or Smugmug.com.
Any images that need further processing, will move to the full retouching phase.
full retouching
I am meticulous about this part of retouching and will outline my typical process, but I can of course match your style and needs.
I open the files from LR into Photoshop, run a quick action that sets up various sub actions - I have a set of actions I’ve created/modified over the years. A lot can be done with the software tools that I listed above, but I like to set up for hand-retouching first so I can make any manual adjustments on top of those edits.
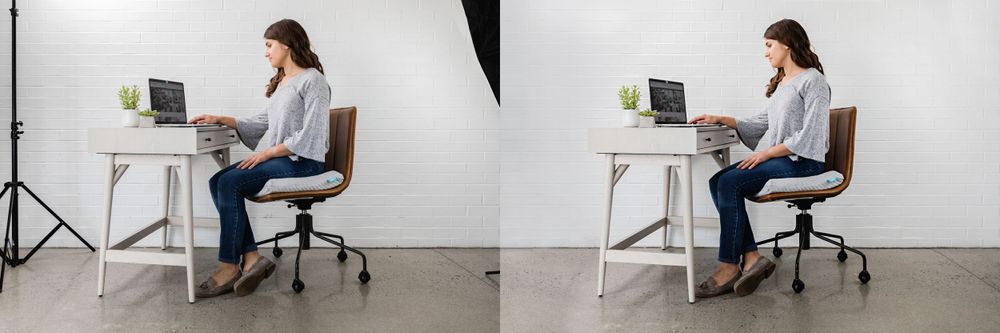
I won’t do any slimming or body modification unless requested, but I will typically smooth out clothing bumps and back rolls. For example, in this image, I just smoothed out a few zipper bumps on the back:

retouching
For facial skin, I will run PortraitPro, which has various levels of smoothing. I mostly just use their skin smoothing, eye brightening and teeth whitening but at minimal levels. This example is typical for headshots but I can always pull back on the skin smoothing and adhere to whatever level you prefer. I also cleaned up her part and flyaways.
I can hand paint in airbrushing if needed for skin color consistency or for adding contouring for both face and body.
I will reduce or edit out stray hairs as needed, if it’s really distracting. I can also help blend roots growing out.
I have fixed nails and cuticles before, if the client requests it or it something jumps out at me.

Luminar + topaz
Next, I’ll open it in Luminar Neo, which I mostly use to add some “pop” to the image. I don’t do it all the time, but when needed I can add additional bokeh and they have a “Relight” feature which can darken the background and lighten the subject (or reverse).
The final touch is using Topaz to take down any noisiness and sharpen any softness. This is great for any slightly out of focus images, but also as a good overall sharpener.
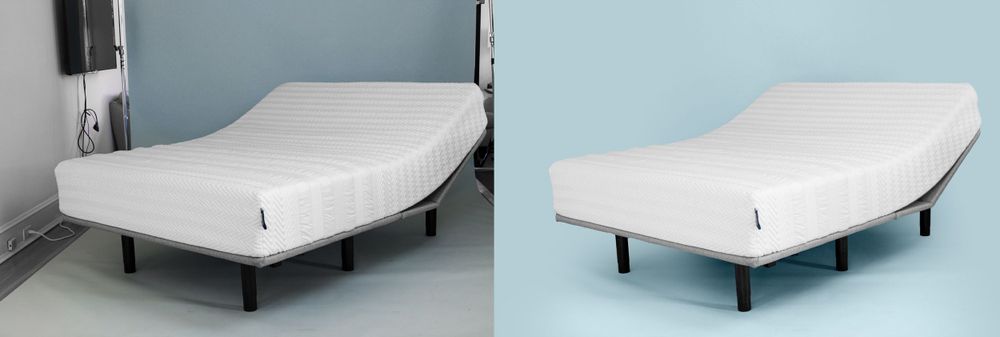
This image below I used both the relight and add bokeh feature (after removing the house in the background with mix of AI and hand-edits):

an image in four edit states
This is a single image in four edit states, please read the captions for what I did at each step:

Original with basic lightroom edits, but no other retouching or color correction

In Photoshop I did a mix of color balance, HSL, and masked in some color correction in the background where the color cast was skewing yellow.

Added light airbrushing under eyes, removing glasses glare, stray hairs across her face, removed lint from dress, larger blemishes, then ran PortraitPro and Luminar Neo to give it a boost.

This is the final image run through Topaz, it denoised then sharpened the image subtly:
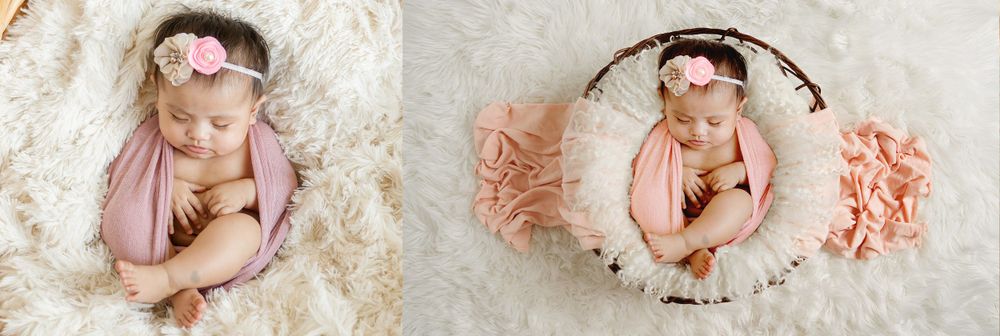
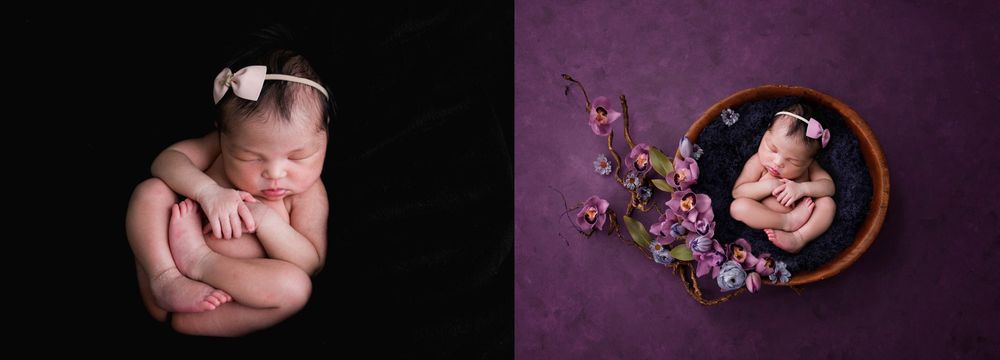
another image from raw to lightroom to photoshop:

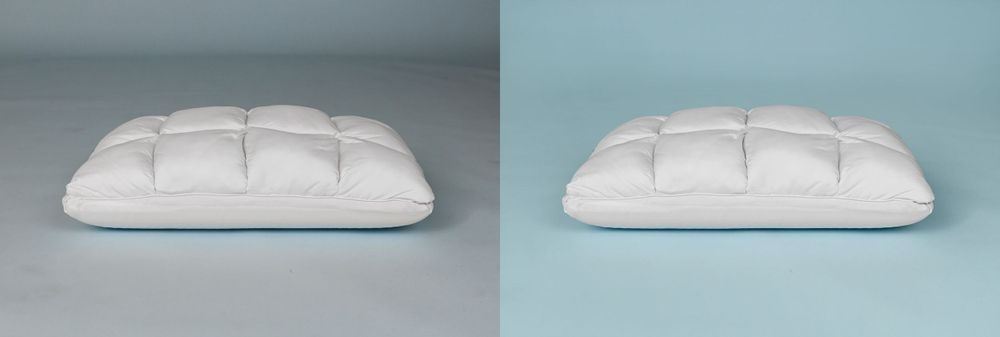
Basic Lightroom Edit vs Fully Retouched
regarding the use of ai
Aside from what the programs like Luminar and Portrait Pro and Topaz do, I’ll use AI inside of Photoshop when extending a background or if I have to rotate an image, I can use AI to fill in the gaps it leaves so I don’t have to overcrop. I’ve also used it to remove objects or help me fix difficult things like eyeglass glare and wonky clothes - this client kept accidentally messing up how he tucked in his shirt, so I used AI to help “fix” it without me wasting time doing it by hand. I also used the AI fill to fix the sunspots. I've also used AI to remove the electrical boxes and lines, by request.

finishing+ exporting
I’ll send you a gallery of finished, but watermarked images to check over and approve before I export the final, high res images. The final balance on your invoice will be paid at this point as well.
If approved, I will upload the final images to Pixieset or Smugmug.com, sized to your preference (I usually do 3600px at 300 dpi for my client deliverables, just let me know what you prefer). If you want the .PSDs, Smugmug allows .PSD uploads as well.
I’ll delete both JPEGS and .PSDs from my hard drive once you confirm you’ve downloaded everything and delivered them to your client.. We can adjust this timing for your own process and delivery system.
print-ready services
If you purchase retouching services, I’m also happy to help with your client product deliverables. DCPG is a print product-based business as well, so whatever products you offer your clients I likely have experience in formatting an image for it.
- Format and optimize finished images for printing at vendor specs and sizes (including canvas wraps and other photo products)
- Design album layouts in Fundy
- Send finished images to you, ready to be uploaded to your vendor of choice and labeled with product size and vendor, as to not confuse it with the original edited image.
pricing + turnaround times
These prices are a la carte, but I’m willing to discuss a per gallery and eventually a monthly rate if you have consistent work to send my way! Just let me know what combo of services you need and how many images you typically end up with and I can give you some options:
- Culling .05/image (based on initial # of images sent)
- Basic Edits: LR edits and light retouching $1/image. Great for soft proofing or even final images. Light retouching is removing easy stuff like light stands or feet from the edges, running the image through various software, but no hand-retouching or airbrushing.
- Full retouching $5/image. A fully meticulously edited image, ready for print or digital galleries.
- Album Design $5 per spread plus 3 rounds of revisions. $20 for additional revisions after initial 3 rounds. If you’re interested in this, I’d love to see any old album designs to get a feel for your style.
- Heavy-duty Photoshop starts at $10/image. This is including, but not limited to: newborn or other composites, headswaps, people or object removal, removing glasses glare, adding Godzilla running after your bridal party, putting in a velocipator peeking around the corner, etc. I will need to see the original image first and quote accordingly.
Turnaround times:
- LR Basic Edits 1-3 days for portraits, 7-10 days for weddings/events
- Culling +1 day
- Full retouching, entire gallery 1 week for portraits, 2 weeks for weddings/events
- Album Design one week
You can mix/match services if you need only some images fully retouched and the rest LR edits and I can custom quote that. I will bill 50% of the invoice to reserve your editing slot, then the final balance is due before I upload the final images to you.
Thank you so much for your consideration, I'm looking forward to helping you offload your editing work!
Before vs. after gallery